
G. David Mackey's Homebuilt Short-Wheelbase Recumbent - 10/2009
G. David Mackey sent along the following information and photos of his first homebuilt recumbent. I especially like the way he has in essence laminated the used bike frame parts between a couple of pieces of wood. Simple and effective!
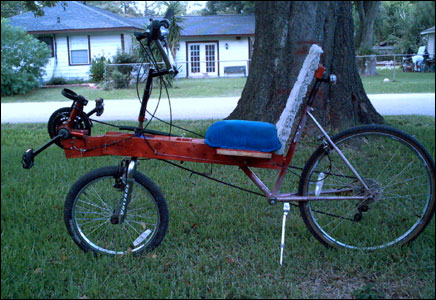
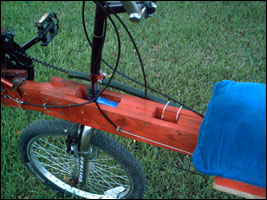
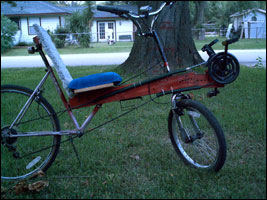
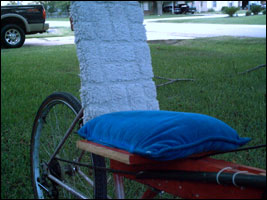
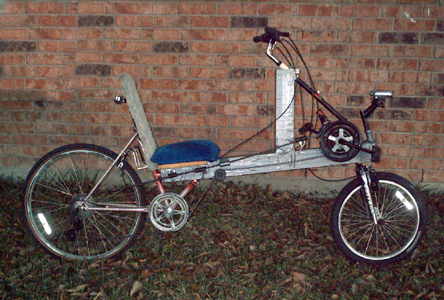
"Inspired by the bikes in your 'bent share and elsewhere, and further spurred
on my the discomfort my commuting wedgie was giving me (I couldn't take that
pain in my wrists and butt anymore!), and having a big collection of hand
tools my dad left me, I scrounged up some parts and took a crack at it.

My MWB homebrew, "Junkyard Dog", turned out to be very stable, with
surprisingly good handling.
The seat cushion was a lucky find: A throw pillow so tightly packed with foam
that it's very firm, yet eats bumps for breakfast. Effective suspension on
the cheap, it was only $2 at the dollar store.
Everything else - excluding spray can paint, wood screws, bolts, and some other
bits of hardware, new tires, chain, and cables - came from junker bikes
recovered from a salvage yard.
Chain management done via pieces cut from a leaky old garden hose. Even the
1x4 planks I built the frame from and the hardwood planks I made the seat
from were salvaged.

I have some bits left over, so I may build an over-the-rear-wheel cargo rack
for it. It's ugly as sin to be sure, but it's heaven to ride."
|
|
|
|
|
 |
 |
 |
 |
 |
 |
 |

I asked for some more details on this inexpensive wood-framed recumbent and ...
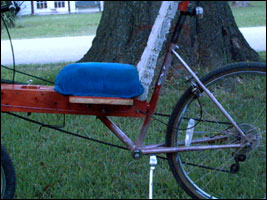
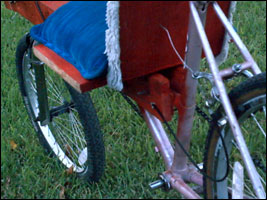
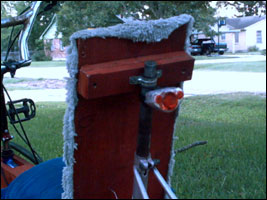
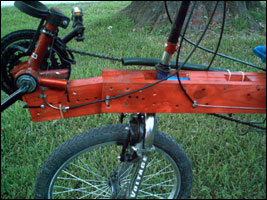
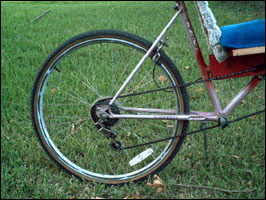
"I 'stole' ideas from "Woody" and "Widowmaker" and tweaked on it here; The
frame is a sandwich of parallel 1x4s. The rear triangle and the headtube have
enough or their donor frames left on so I could crosspin them in with bolts
and long wood screws. The seat is part of the frame, held down with long wood
screws. So I stuck a seat post in and clamped the seat back to it with an EMC
bracket I had laying around.

To add strength and stiffness to the frame without adding a lot of weight, I
made blocks, inserted them between the main frame members, and screwed them
into place.

Steering: What happened here was my answer to a conundrum. I priced risers
from Rans and Bachetta, and after recovering from the sticker shock, I came
up with my own. I cut the quill from a BMX stem, clamped a section of EMC to
it, and stuck an MTB stem with BMX bars into the EMC. From there I adjusted
the height and angle of the bars so my knees had clearance under the
shifters. As a plus, the crossbar built into BMX bars makes a handy place to
mount lights.

If you put a couple of small wood screws close together, they make pretty
decent cable stops.

The BB was attached by drilling new holes through the kickstand bridge, and
making a bracket to attach to the cable guide hole in the bottom of the BB.
Application of long wood screws and a bolt did the rest.
When you have a bottom-pulled front der, and the cable needs to make a sharp
bend to work it - but bending the cable housing that sharply doesn't work -
then using the curved cable stop from a sidepull canti brake does the trick.

When you want the stopping power of a front canti brake but the fork doesn't
support cantis - no canti bosses - then you can go to a welder with your fork
and some spare bosses, OR you can take a broken MTB suspension fork and saw
off the arch complete with canti bosses and make a canti adaptor.
In hindsight, I should've set the BB a little lower. But for a bike that cost
some sweat, some blood (I busted a knuckle when the wrench slipped), and $25
and some change, handles well and weighs in at about 20 pounds, not bad at
all."
Here is an update, received 12/29/09 from G. David Mackey: Junk Yard Dog mk II (JYD).
After a crash which left me unharmed except for some road rash and a bruised
pride, and broke the boom off the bike, I went and rebuilt JYD using all new
lumber with the idea of making it stronger, and correcting some mistakes. I
wound up teaching this mutt some new tricks.

New for Junkyard Dog mk 2 -
- The main beam is now a solid 4x4, except where the head tube and rear end
are sandwiched in. Those get a double reinforcement treatment to boot.

- Improved chainline management. On the return side, an idler from a broken
rear der hides under that big black plastic disk; the disk is there to keep
the chain from jumping off the idler. An old chainring stuck on makes a
second, honkin' big idler. On the power side, the chain is kept straight as
possible; those bits of tubing are there to keep the chain from grinding
itself to death over the bolts holding the rear end in. This is quieter and
way less power sucking than the previous management system.

- Head tube set just in front of the BB. This extends the wheelbase to 56",
giving the bike improved stability at speed, and better tolerance of quick
steering input. It eases chain management as well, not having to guide the
chain over the fork. Since I really hate tiller steer, I took a hint from
Mochet and homebrewed a u-joint linkage.

- Now that thing on the nose of the bike: LED headlights rule hard. A
homebrewed 'spacebar' knockoff to clamp them onto rules harder.  :)  This is
made from a steerer tube from a broken fork attached firmly to the bike, then
a stem bolted into it, then a short piece of pipe clamped into the stem.

- The finish is simple duct tape. I know, tacky and so totally ghetto. BUT,
duct tape is cheap, tough, and waterproof, way more so than rattlecan paint.
Wood and weather aren't best of friends, after all.
On top of that, an uglyfied bike is great theft deterrent - the crooks would
rather thieve a pretty bike and leave the grungy bike alone.

I'm not done yet. I'm on the lookout for a set of classic rat trap steel
pedals, and a classic chopper style mirror on a gooseneck mount.
Also, a tailbox/trunk is in the works.