We went through a number of different types of compost bins in our
early years, from poles to snow-fence to chicken wire, until we came up with a
design that we liked and have used since. It works well and is easy to manage
and use. The original was made from materials salvaged from several redwood and
hardware cloth tomato racks we had built for our first garden back in the city,
years ago (we would never buy redwood lumber now) and lasted us for some twenty
years, with some plywood gussets added later for reinforcing as the panels aged.
It is basically a long hardware cloth and wood frame rectangle divided into
three bins.
This past summer we finally had to replace the rotting wood frames, but the
hardware cloth was still as good as new and was able to be reused. We bought
rough 1 x 4 white cedar boards this time, as they will last a long time and are local wood. It took 2 - 10 ft boards for the back horizontals, 3 - 10 ft
boards cut into thirds for the side horizontals, and 4 - 8 ft boards cut into
thirds for the side verticals. This gave us a bin slightly more than ten feet
long, 40" deep, and 32" high. Since the boards were rough cut not
dimensioned lumber the lengths are a little longer.
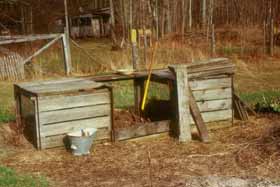
The design and assembly is fairly simple as you can see in the photo. We
made one long rectangle for the back, and four smaller rectangles for the sides
and inner dividers. The panels were made by simply overlapping the boards at the
corners and screwing them together with drywall screws. The hardware cloth was
stapled between the boards before screwing. The completed panels were then moved
to their place in the garden and the side panels screwed to the back. This way
we can easily disassemble the unit should I want to move it (which we did
several times over the next ten years), or to turn the
panels over when the bottoms start to show rot, thereby extending the life of
the unit many years.
The early bin had separate front walls made of boards with inch strips nailed
on to keep them apart and provide ventilation (salvaged from an old potato
warehouse). These boards slid into (and out of) tracks made of two pieces of
rebar pounded into the ground. The rebar tended to flop at the top so we added a
cap of wood or wire to hold them together. This worked fine but at one moving of
the bin, I decided it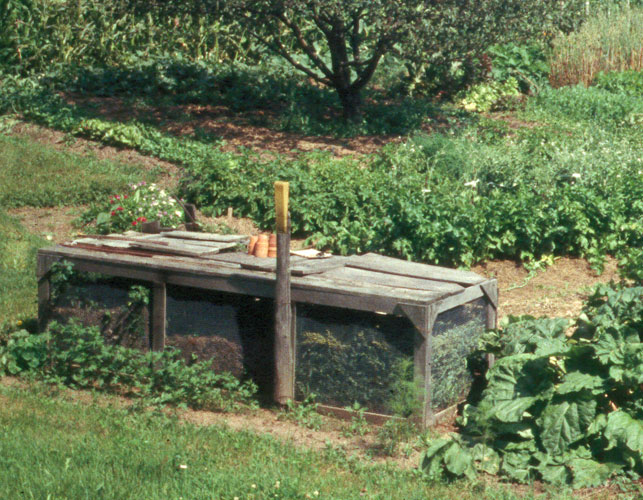 was more fussy than necessary and ended up just using a
couple of old pallets for the fronts, wiring them to the side panels at the
tops. There are only two pallets as the empty or near empty bin doesn’t need a
front. The new compost bin uses the same simple pallet fronts. (still in use
ten years later)
was more fussy than necessary and ended up just using a
couple of old pallets for the fronts, wiring them to the side panels at the
tops. There are only two pallets as the empty or near empty bin doesn’t need a
front. The new compost bin uses the same simple pallet fronts. (still in use
ten years later)
The side panels have a lot of pressure on them when the bins are
full and they tended to move, so I pounded short pieces of rebar on either side
of the front edge of the side panels to keep them secure -- an easy solution that
worked well. For the tops we made cleated boards that slip over the front top
edges like large wooden staples.
Board and plywood scraps are the lids. And when the raccoons get too
rambunctious and start hauling stuff out and all over, I throw a scrap piece of
fencing on top of to keep them out.
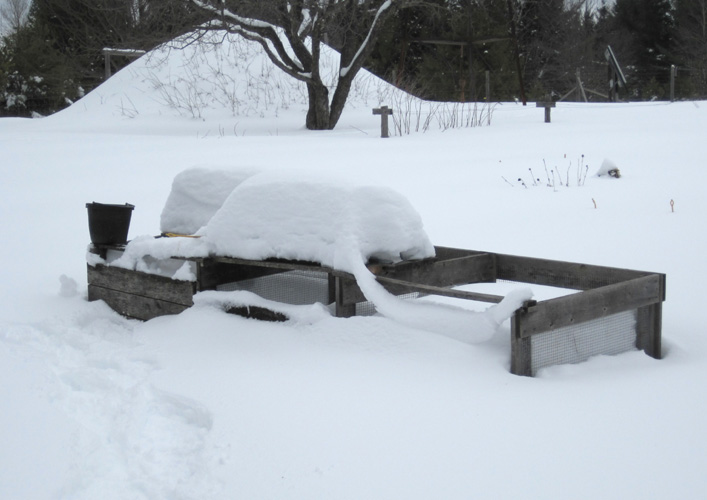
The management of the three bin unit is simple. One bin is current stuff --
all winter and all summer all kitchen wastes and some garden waste goes into
this bin, however it occurs with no particular order or "recipe". In
the fall this "current" pile will be covered and left to work, and a
new "current" pile started. The second bin is last year's pile, just
sitting there continuing to compost. Bin 3 is from the year previous and this is
what gets screened and moved into the greenhouse for winter and spring potting
soil. Whatever is left gets shoveled onto the "resting" compost in Bin
2. In the spring, I use this compost around transplants in the garden. If I
have a lot, it gets spread on a plot that I think might appreciate a little
boost, being sure to leave enough for the fall potting soil. The empty Bin 3 is now the
new "current" pile. And so it continues.
The compost does just fine this way, and many years that’s all I do. There
are always some pieces and chunks that aren’t yet decomposed when I dig it for
potting soil or garden compost, but these are easily removed and thrown into the
current pile. However, I sometimes get ambitious and shovel the contents of one or another of the
bins into another bin to help the process along. It seems to help get the
composting going faster. I’ve found this particularly
helpful in a overly wet or overly dry year. Actually, the management of the bins
is not as clearcut as I’ve explained above, it all depends on how the compost
is coming and what and when I need it. I'm pretty laid back about the whole
thing, leaving the compost to do what it does without interference, which it
does very well.
You can do much more shoveling and fussing and management if you want -- it
does speed up the composting process and probably doesn’t hurt -- but it’s a
choice not a necessity. I’ve always found enough other projects to keep me
busy. There is no special compost recipe that I use, nor do I add any purchased
this or that. What we have is what goes in. On a "bad" apple year, a
lot of cull apples go into the bin. On a good year, most of the apples go into
sauce and dried apples and cider and vinegar, just the waste making its way to
the bin. When we had chickens, they got most of the kitchen scraps so our pile
was mainly weeds and garden plants. Then the chickens left and everything went
into the compost pile. Then I reread Ruth Stout and Richard Clements great book
"The No Work Garden Book" and picked up several points I had somehow
missed in earlier readings. One was -- Why carry half the garden to the compost
pile only to haul it back again to the garden? Why not leave it where it is and
let it compost right there? Why not indeed. That's how Nature does it, and she
is sure a much better gardener than I am! So I pretty much stopped hauling
garden plants to the compost pile. Now it's kitchen scraps and whatever I pull
out of the garden that I don't want, for one reason or another, to leave where
it is. Both the garden and the gardener are very happy with this arrangement.
And the compost is as good as ever.
An even easier alternative would be sheet composting, right in the garden.
But then I wouldn’t have any compost for potting soil [see Potting Soil
article]. So the compost bin stays a part of my garden and our life, as well as
a boon to many small creatures and birds who make use of it in their own way.